Editing the pegging information
The Tools > Set Pegging menu enables you to register your scanned image to either:
- a new pegbar position, or
- a new position based on a numeric offset from pegbar A - which is deemed to be the origin.
This is typically used:
- When a character has been animated so that it travels over a distance greater than the amount covered by a single pegbar. (Pegbars are spaced 8 inches apart.) For example, the running girl may travel across more than one pegbar, so you would need to edit the pegging at the particular frame where she moves to a new pegbar.
- To give movement to a character that has been drawn moving 'on-the-spot'. (Movement can also be performed using the Transform node in Director; see The Transform-type nodes.)
To change the pegging to a new pegbar position
- Click on the frame information area beneath the frame you wish to edit, in the Drawing Browser window. An outline box is drawn around this area.
- Choose Tools > Set Pegging, and - from the menu displayed - select a letter to denote the new pegbar position.
- The pegging information for the selected frame is changed in the Drawing Browser window.
To change the pegging to a numeric position
- Click on the frame information area beneath the frame you wish to edit, in the Drawing Browser window. An outline box is drawn around this area.
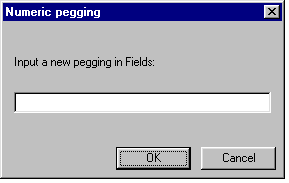
- Choose Tools > Set Pegging, and - from the menu displayed - select Numeric. The Numeric pegging dialog box appears:
- The units used for specifying the value are defined in ScanLevel's preferences. (See Setting display options for pegging.)
- Type in a value for the pegging:
- The value you specify offsets the frame to the right of pegbar A, which is deemed to be the origin.
- To specify a position to the left of pegbar A, you can enter a negative value.
- Click on OK.
